Logged in as either a dispatcher or base admin you can create and edit trips.
Select the Driver Widget to display the count of Online Drivers, Available Drivers, Busy Drivers and Offline Drivers.
Select the Trip Widget to display the sum of Total Trips, Upcoming Trips, Unassigned Trips, Booked Trips, Completed Trips and Cancelled Trips.
You have the ability to view this information over whatever date range you wish by using the calendar in the upper right corner of the screen.
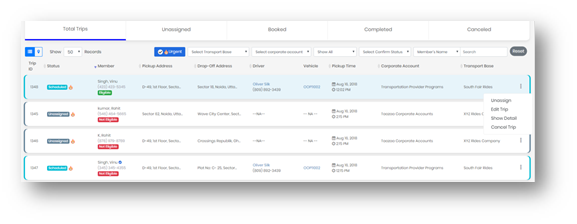
You can filter Trips by corporate account name, urgent-non urgent status, trip type, eligibility and confirmed status. You can also search for trips by address, billing system ID, Broker ID, Invoice number, passenger name, passenger phone number, driver name and Trip request ID:

By selecting the trip menu (3 dot icon) the following trip options are available:
- Assign
- Edit Trip
- Trip data.
- Show Detail
- Complete offline
- Cancel Trip
- Broadcast Now
- Re-assign
- Unassign
Select Show Detail to see trip information.

Changing/Unassigning a Driver from a trip
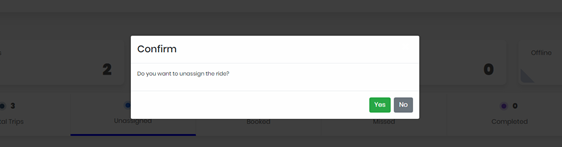
You can change which driver is assigned to a particular trip by clicking Unassign as shown below:
This will prompt a pop up confirmation message to unassign the driver. Clicking on "Yes" will unassign the current driver.
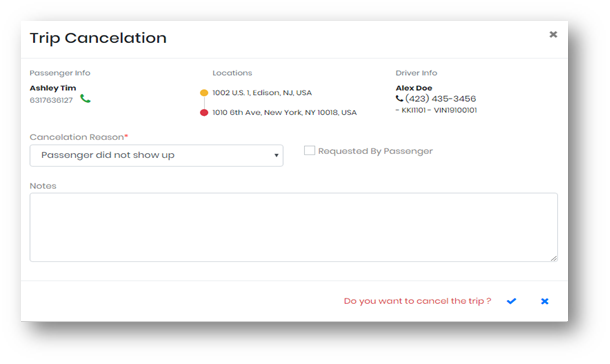
Cancelling a Trip:
1. Select TRIPS
2. Click on the Actions (3 dots) of the trip that you would like to cancel
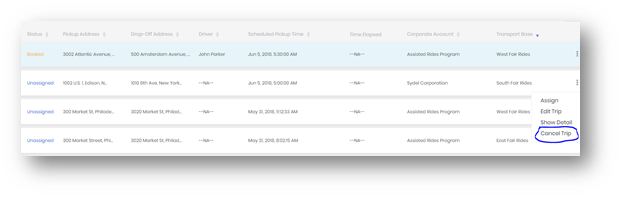
3. Click on the Cancel Trip option. A trip cancellation form will then appear
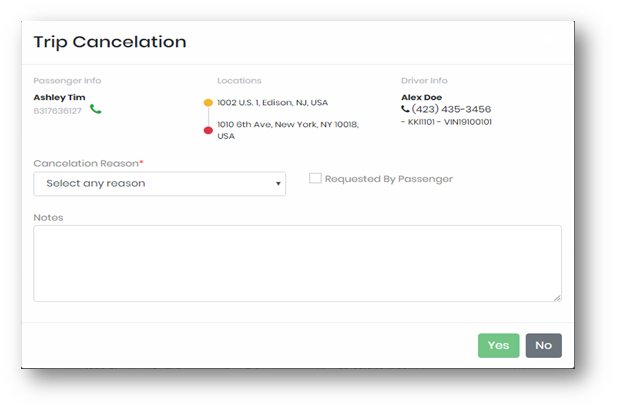
4. Fill in all required fields and select "YES", confirm submission by clicking the check mark
Manual Trip Assignment:
A trip can be manually assigned to a driver via "Assign" link in the actions list."Check availability" link will show the driver's scheduled trip information, with that in mind, you can choose and assign the trip to the right driver. Click on assign button to assign the driver to the trip.

This will change the status of the trip from Unassigned to Booked. Driver info will appear in the list.
Adding a Scheduled Trip:
Click on TRIPS --> Add Trips button
This will open the Add Trip Screen:
Trip Details Contains fields like Pick up Address, Pick up phone number, Destination phone number, Destination and Trip Date (Date of trip)
Passenger Info contains fields like Corporate Account drop down; New/Existing buttons to define the passenger type.Add the Medicaid ID of the existing passenger and click on lookup User. This will populate the data of the existing member
Additional Trip Details contains number of Passenger(s), Luggage, Vehicle Type, Accessibility,
Select Driver (Only online and available drivers of will be shown in the list), Auto Dispatch check box and a Note.
Fill all the other required fields and click on save button to add the trip.

if a trip is marked as “Completed offline’’ this will be display on the list as “completed offline”.
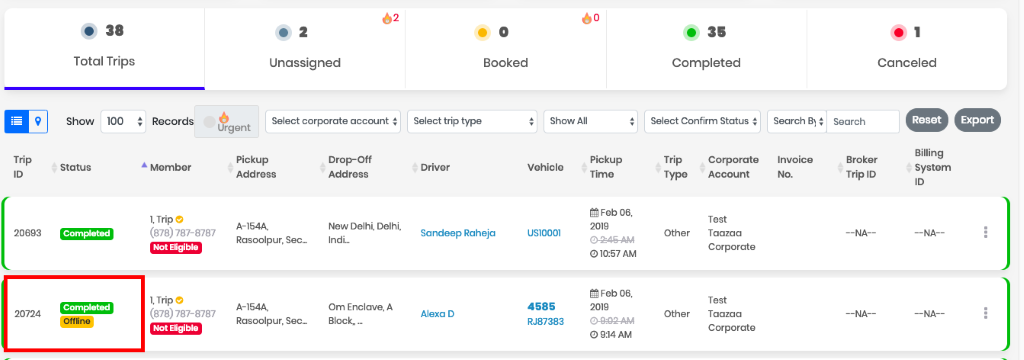
same is implemented for “no show’’. If a trip is cancelled by the driver and marked as a “member no show”. A tag will be display in the list of Trip as “No show”.
Trips in Congestion zone: We have added a flag set to count any trip that goes below 96^th^ in Manhattan. This flag will reflect on the TLC report which you can download from the completed trip list screen.
Trips which are-
- Starting from the 96th in Manhattan.
- Ending in the 96th in Manhattan.
- Passing through the 96th in Manhattan.
Will be marked in congestion zone.
In TLC report, a column (Congestion zone) displaying the status as YES or NO, If the trip status lies in the above condition's column will show the value “YES” else “NO”
Note: we will calculate the congestion zone from the Driver pickup point and the destination.
0 Comments